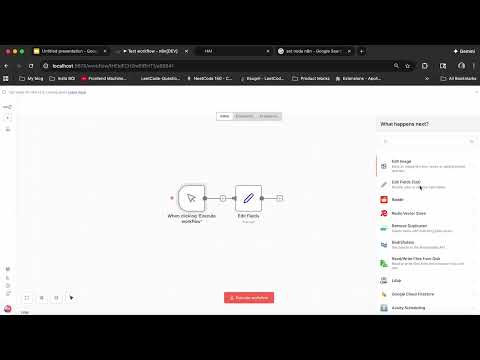
Automate Everything with n8n! No Code & Low Code Workflow Automation | Humanitarians AI
A Humanitarians AI student fellow builds a custom n8n AI agent step by step, connecting a Gemini chat model, adding conversation memory, and wiring up Gmail so the agent can actually send emails on request.
Most workflow automation tutorials stop at connecting two apps together. This one goes further, building an actual conversational AI agent from an empty n8n canvas, one that remembers what you've told it and can send a real email on your behalf, without writing a line of code.
What n8n is doing under the hood
Before building anything, the video frames what n8n actually is: an open-source workflow automation tool that lets users automate tasks and connect different services and applications visually, without code. It supports over 200 integrations, including Google Sheets, Slack, GitHub, and custom APIs, and workflows are built by placing nodes on a canvas and connecting them, which is what makes the tool accessible to non-technical users as well as developers.
Building the chat-triggered agent
The build starts with a chat trigger node, made publicly available with a custom initial message. From there, connecting that trigger to an AI agent means using n8n's Advanced AI category, which lists several agent types: a tools agent, a conversational agent, an OpenAI functions agent, a SQL agent built for interacting with databases, and a ReAct agent that combines reasoning and action iteratively. The tutorial uses the tools agent, and connects its input directly from the chat trigger's chat input field. With the agent node in place but no chat model attached, n8n flags a warning triangle, since a chat model is required. The video attaches a Google Gemini chat model here, using an API key generated from Google AI Studio, and selects the Gemini 1.5 Flash model specifically. A quick "hello" test confirms the connection works end to end, chat trigger to agent to Gemini and back.
Giving the agent a memory
A plain chat model has no memory between messages, which the video demonstrates directly: asking "what's my name" before adding memory gets an honest "I don't have access to personal information." To fix that, a memory node is added, with window buffer memory as the option used here, alongside alternatives like Redis, Postgres, or Zep for different storage backends. The memory node uses a session ID and session key to track what's been said in a given conversation. After typing "my name is HP," asking the agent "what is my name" correctly returns the stored name, confirming the memory buffer is working.
Turning conversation into email action
With chat and memory working, the tutorial adds a Gmail tool node to the agent, connected to a Gmail account, with a manually written tool description of "send emails." Configuring the node means setting the resource and operation, choosing from options like adding a label, deleting a message, marking read or unread, or sending, and the tutorial selects "send." The recipient email, subject, and message body are all set as dynamic expressions pulled from the conversation rather than hardcoded values. Testing it with the prompt "send an email to Naira to fix an appointment" doesn't send anything blindly. Instead, the agent asks for the missing pieces it needs: Naira's email address, a subject line, and what the message body should say. Once those details are supplied, the email sends successfully, visible as a completed step with the input and output both shown in the workflow.
Beyond this one workflow
The tutorial closes by pointing at how this same pattern extends. A data transformation node can reshape information before it's written to storage. An Airtable integration can save contact details, like email addresses, so they don't have to be typed out fresh every time an email gets sent. The underlying idea is that this specific agent, chat plus memory plus one Gmail action, is a template: the same trigger-to-agent-to-tool structure works for storing data in a spreadsheet, filtering records, or wiring in other services like Slack or Teams.
Key takeaways
- The agent is built from a chat trigger connected to a tools agent node, which requires a connected chat model, here Google Gemini 1.5 Flash, to function.
- Window buffer memory, tracked by session ID, gives the agent the ability to recall details like a user's name across a conversation.
- A Gmail tool node lets the agent actually send emails, with the agent asking clarifying questions for any missing recipient, subject, or message details.
- Fields like recipient email and subject are set as dynamic expressions pulled from the conversation, not hardcoded.
- The same trigger-plus-agent-plus-tool pattern extends to other integrations, including data transformation nodes and Airtable for storing contact information.
Who this is for
This is a hands-on starting point for anyone who wants to build a working conversational AI agent without writing code, whether for personal use or as a first automation project. It was created by a student in Humanitarians AI's Fellows Program, which pairs a learn-by-doing and learn-by-teaching approach to help students and recent graduates build both technical skills and the ability to explain them to others.
Full transcript(auto-generated, with timestamps)
[0:00]Hi, this is a brief introduction video on N8N. So this is how uh this is uh the website for N8N. It it is basically a workflow automation tool that gives flexibility to teams to um to speed up code. Hi, this is a brief introduction video on N8N. It is a open-source workflow automation tool that allows users to automate tasks and integrate various services and applications without needing to write uh any code. It supports over 200 uh different integrations including popular services such as Google Sheets, Slack, GitHub and as well as custom APIs. uh users can build workflows by creating nodes and connecting them visually which makes it
[0:49]Accessible to both technical and nontechnical users. [snorts] N8 n stands for nodes and the eight 8 in the middle st represents the concept of automation loops. Uh today we'll be creating a custom AI agent. Uh so this is how the workflow automation uh n website looks like. Um yeah uh you can use it for free as well. Get started for free. So this is how the dashboard looks like and you have to click on open when you go to the dashboard. Okay. So I've already created two workflows. Um if I want to create a new one I have to click on create workflow. So since we are creating a custom AI
[1:42]Agent, I am going to uh click on uh add first step that is I'm going to start integrating all the tools over here. Uh this is uh uh if you want to know about the tools you can click on the on the plus sign and you can see different tools that are over here. For example, um you can go to on chat message. This is where the chat option is. You can click on make chat publicly available. I'm going to I'm going to change the initial message. I'm going to just put it as hello. And I don't want to make any of any other changes. Uh you can use this to um
[2:31]Access the chatbot. Uh so I've made it publicly available. Um done with that. Now I want um the chat that I'll open click on the open chat thing. And if I want to send this message to the AI agent, I need to add that tool as well. So it needs uh whatever we type over here, it needs to go somewhere. For example, if I write hello, the message was received. But where does this message go? So we have to add a tool over here and there are different uh nodes that are available that is advanced AI action and an app data transformation that is used for manipulation.
[3:18]Uh then there is code uh that you can where you can run code and make HTTP requests and yeah so for now I'm going since we are creating a custom AI agent I'm going to click on advanced AI it is it is going to show a list of options for example what is uh what uh are we using it for for example open AI we using it for message and assistant or GPT analyze images and generate audios you can create a basic LLM M chain you can use it for sentiment analysis. So it is giving you different models and notes. Uh I'm going to since I'm using um
[3:58]Uh since I'm generating an action plan, I can click on the AI agent. Okay. So uh this is uh these are the settings that we have to do uh for it to start. So I'm going to keep it as tools agent but you can change it to a conversational agent, OpenAI functions agent, SQL agent uh that is used for specializing uh in interacting with SQL databases. You can use it for uh as an as a React agent that combines reasoning and action in an iterative process. So for now I'm going to use it as a tools agent. So you have to click on that. Uh you can
[4:44]Uh choose from uh um connected chat trigger node and define below the connect chat trigger node is you uh is used for an input field called chat input that is coming directly uh from the chat trigger that we already have and the other one is defined below. You can use an expression or to reference data in previous nodes or enter any static data. So I'm going to since my messages are coming from the chat trigger. So I'm going to click on this. Yeah. So this these are the parameters that we have set. Uh these are the settings. I don't want to change any settings u right now.
[5:26]So retry on fail execute once always output data all these are settings that you can do uh for your AI agent. Um I'm not adding anything right now. So you have to click outside the box to close it. And yeah now uh it will show a triangular uh error. Uh since we do not have any chat model where this will go. So first we'll have to add that. So I'm going to click on chat model. Uh I have a I have different uh chat models available here. For example, deep Google uh Gemini chat model um open air chat model. So for using these you uh you'll need an API
[6:09]Key that you'll get from those uh particular uh particular um website. So for example for Google Gemini chat model you'll need an API key from the Google AI studio and for open AI chart model you need uh the API key from open AI. So right now I'm going to be using uh Google Gemini chat model. Okay. So I have clicked on that. Uh so to use it you'll have to create a create uh new credential and you'll have to enter your API key over there. I have already done that and I'm going to click on this. So the model there are different models that are given over here. I'm going to
[6:54]Be using um 1.5 uh flash oh sorry 1.5 uh flash Gemini. Yeah. So I'm done with that. Um I've already selected it. Now you can see the the error warning is not there anymore since I've connected to the to the chat model. I am going to write hello again and let's see what's what's the output. Yeah. So you can see um the chat message went from here to the AI agent and that was directed to the Gemini chat model. Um yes so this is uh this is how we know that it's working. Uh now since we need a memory for example if I type what's my
[7:54]Name I don't know your name you don't have I don't have access to personal information. So uh if I need an information from this AI agent I'll need to attach it to a database kind of a thing. So for that I'm going to click on memory. Um there are different things that are given over here. memory allows an AI model to remember and reference past interactions. So for now I'm going to be using window buffer uh memory. You can experiment uh uh with the memory by using radius postgress or zap as well. I'm going to be using this. So uh so as you can see there are
[8:38]There's one session ID that is given over here and there is session key from previous node. So it will get whatever the information was there in session ID over here and that will be stored in the database. Uh if you want to give if you want to give any notes or display note in a flow you can do that as well. I'm not going to touch this. Uh I think this is fine for my workflow. So yeah this is done. And now I'm going to write my name is HP. Yeah. So now this information has been stored in the window memory buffer as you can see. Um now I can just ask it
[9:22]What is my name? Yeah. So here you go. You can see it has given me my name uh since it was stored in the memory buffer. Um yeah and it saves input in this form input system message. Uh by the way you can change this uh system message as well. And this is the output that uh I have got. So now you can see how this workflow works. Um I still need something for this to work on. So I think I'm going to add a tool over here. Um there are couple of tools that are given such as Slack, Teams, all those tools. But I'm going to
[10:08]Use Gmail tool. Okay. So, there are a ton of settings that I need to do over here. First of all, um you'll have to connect it with a Gmail account. Uh then you have to set the tool description. For example, I'm going to set it manually. I'm going to write um I'm going to write um set the description as send emails. Set it to that. Um there are this is resource. So these are uh different settings that that are very important for you to do. So what operation do you need to perform when you're adding this? Do you want add label? Delete the message. Get mark as red, mark as
[11:05]Unread. So I'm going to put it on send because I need to send an email. Next uh two, which who are you sending this mail to? So I'll use an expression of this sort. Um and I'm going to write email ID. So it is going to fetch the email ID from this and it is going to send the email to that person. uh subject I'm going to I think I'm going to do the same thing. Just write subject over here so that it fetches the subject as well. Then email type uh let's set it to text and what the message is then that's also going to be custom.
[11:49]Um I'm just going to write message. Yeah. So now it has been set. Um, I don't think I need to put uh any settings. So, I'm going to click outside the box. Now, this is done. Um, I just want to write send an email to Naira to fix an appointment. I'm just going to write this. Let's see what it says. Okay. So now you can see that it says that I need more information. What is Naira's email address? What is the subject? What what is the subject of the email? And what should be the body message? Uh should I include the email to Naira abouting an appointment? Please
[12:41]Let me know what time best what time works best for you to meet next next week. So it needs all these information all this information uh to send the email. So, I'm going to include Naira's email address. Um, for now, I'm just writing it as this Naira appointment request. Just I'm just going to write it like this. Let's see. Okay. So, it has successfully sent the message to Naira. Um, you can see the tick mark over here and you can see the it has taken the input and the email address has been sent. See this is the input and this is the
[13:51]Output. So this is how it works. You can create tons of workflows just like this. This is a custom AI agent that I have created. You can use it for storing any of your Excel uh any of your um data in the Excel sheet. You can filter it. There are ton of things that you can add. For example, there uh there is data transformation that you can use before uh sending it to the database. So the these are the workflows that you can create. Uh there's also an option for air table given. So with air table you can um actually store all the emails if you
[14:37]Don't want to type it every time when you're sending an email to someone. So you can do that as well. So yeah, this is uh this is what N8N is all about. And yeah, [snorts] thank you.